
I have swapped out hundreds of cabin air filters in my time working on cars across Lagos and Abuja, and after checking service manuals for popular models like Toyota Corolla, Honda Civic, Hyundai Tucson, and even Mercedes C-Class, I can promise you this: it really can take just five minutes if you know what you are doing. In Nigeria, with our dusty harmattan winds, constant construction, and polluted city air, that little filter behind your dashboard gets clogged fast. It traps pollen, dust, smoke, and even exhaust fumes so you breathe cleaner air inside the car. When it is dirty, your AC blows weak, smells musty, and you end up with more allergies or headaches on long drives. Replacing it every 15,000–20,000 km (or once a year in our conditions) keeps the air fresh, improves AC efficiency, and can even boost fuel economy by 2–5 %. Plus, a new filter costs ₦8,000–₦18,000 depending on the brand, way cheaper than paying a mechanic ₦15,000+ for the job. Let us walk through it step by step, like I am standing next to you under the bonnet.
First, gather what you need. You probably already have most of it at home. Grab a new cabin air filter that matches your car, check the manual or online (sites like RockAuto or local parts shops in Ladipo list exact fits). For example, a 2018 Corolla uses a filter like the Denso 453-1019 or Fram CF10285. You will also want gloves to keep your hands clean, a flashlight if it is dim, and maybe a small screwdriver for some models. No fancy tools required, this is truly beginner-friendly. Park in a safe spot, turn off the engine, and let us get started. The whole process should clock under five minutes once you have done it a couple times.
Step one: Locate the filter housing. In 90 % of cars driven in Nigeria, it is behind the glove box on the passenger side. Open the glove box fully, some have a stopper pin or dampener arm you need to unclip. For Toyota and Honda, squeeze the sides of the glove box inward to release the stops, then let it drop down like a door. You will see a rectangular plastic cover, usually black or white, about the size of a small book. It might have clips or tabs, no screws in most cases. If your car is older or European like a Peugeot or BMW, the filter might be under the hood near the windshield base, behind a panel. Check your manual for the exact spot; I always tell people to snap a photo of the area before starting so you remember how it goes back.
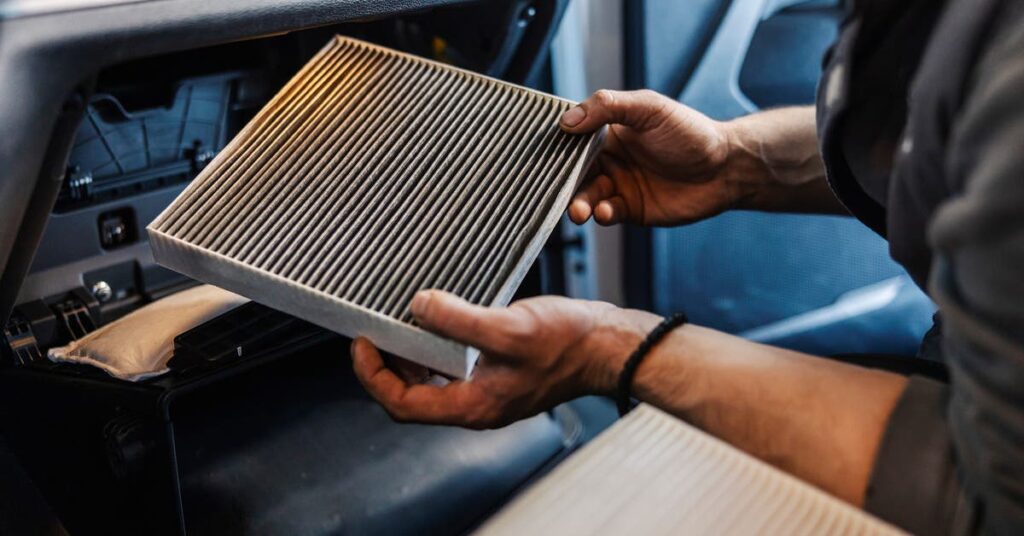
Step two: Remove the old filter. Gently press or slide the tabs on the cover, they pop off easily. Pull the cover away, and there is your filter, sitting in a slot. Grab it by the edges (it will be dirty, full of leaves, dust, and maybe even bugs) and slide it straight out. Do not yank hard; if it sticks, wiggle it side to side. Note the arrow on the filter, it shows airflow direction, usually pointing down or toward the blower. In my experience with dusty Nigerian cars, the old filter often looks black and loaded after just six months, especially if you drive in places like Kano or during harmattan. Shake off loose dirt outside the car so it does not fall into the housing.
Step three: Clean the housing area. This is quick but crucial. Use a damp rag or vacuum if you have one to wipe out any debris in the slot. Compressed air from a can (₦3,500 at shops) works wonders if it is really grimy. I have seen filters fail early because old dust clogs the new one right away. Spend 30 seconds here, it makes a big difference in how long the new filter lasts.
Step four: Install the new filter. Unwrap it and check for damage. Slide it in with the arrow matching the old one’s direction, airflow usually goes from the top down into the cabin. It should fit snugly without forcing. If your filter has a foam frame or activated charcoal (better for odors, costs a bit more), make sure it seats flat. Pop the cover back on until it clicks securely.
Step five: Reassemble and test. Lift the glove box back up, squeeze the sides to clip the stops in place, and close it. Start the engine, turn on the AC or fan to max, and feel the airflow. It should be stronger and smell fresher right away. If there is a rattle or weak blow, double-check the cover is on tight. That is it, you are done in under five minutes.
Now, a few pro tips from all the cars I have worked on. First, always buy quality filters like Bosch, Mann, or OEM from trusted spots, cheap no-name ones from the roadside tear easily and do not filter well. In our humid rainy seasons, go for ones with antimicrobial treatment to fight mold. Second, if your car has two filters (some SUVs like RAV4 or CR-V do), replace both at once. Third, mark your calendar or odometer, in city driving with stop-go traffic, check it every 10,000 km. Signs it needs replacement: weak AC, foggy windows that do not clear fast, or a dusty smell when you turn on the fan.
Common mistakes to avoid:
Do not install upside down, that blocks airflow. Never reuse the old filter after cleaning; it loses effectiveness. If the housing has foam seals that look worn, replace them (₦2,000 extra) to prevent unfiltered air leaking in. And if you drive a luxury car like Mercedes or BMW, some have electronic resets, check the manual or YouTube for your model.
Doing this yourself not only saves money but empowers you. I remember one customer in Port Harcourt who ignored her filter for two years; the AC blower seized from dust buildup, costing ₦180,000 to fix. Regular swaps prevent that. Plus, cleaner cabin air means fewer doctor visits for respiratory issues, especially with our pollution levels.
In the end, this five-minute job keeps your drives comfortable and healthy. Give it a try next weekend, you will wonder why you ever paid someone else. If your car is different (like some older models under the seat), search “cabin air filter location [your car model]” online for specifics. Stay fresh on the road.